Configuring Language Providers and Custom Models
Athina offers flexibility in configuring various language providers and custom models. Here’s how you can set them up:Standard API Key-Based Providers
For language providers that can be accessed via API key and have foundational models:- Go to https://app.athina.ai/settings?activeTab=api_key
- Configure your chosen provider using the API key setup
Advanced Custom Models
For more advanced configurations, including providers like AWS Bedrock, Azure, Vertex AI, or entirely custom setups:- Navigate to https://app.athina.ai/settings?activeTab=custom_models
- Click on the “Custom Models” tab
- Click on the “Add Custom Model” button
- Fill in the configuration details for the custom model
Supported Providers
- Azure
- AWS Bedrock
- SageMaker
- Vertex AI
- Custom (for specifying a base URL for a model with OpenAI schema request and response)
- Save the custom model
Using Your Configured Models
Once configured, your custom models will appear in all model selection menus throughout the platform. This allows you to easily select them for:- Running prompts
- Conducting experiments
- Performing evaluations
Step-by-Step Example: Setting Up AWS Bedrock
Here’s a detailed guide on how to set up AWS Bedrock as a custom model in Athina:-
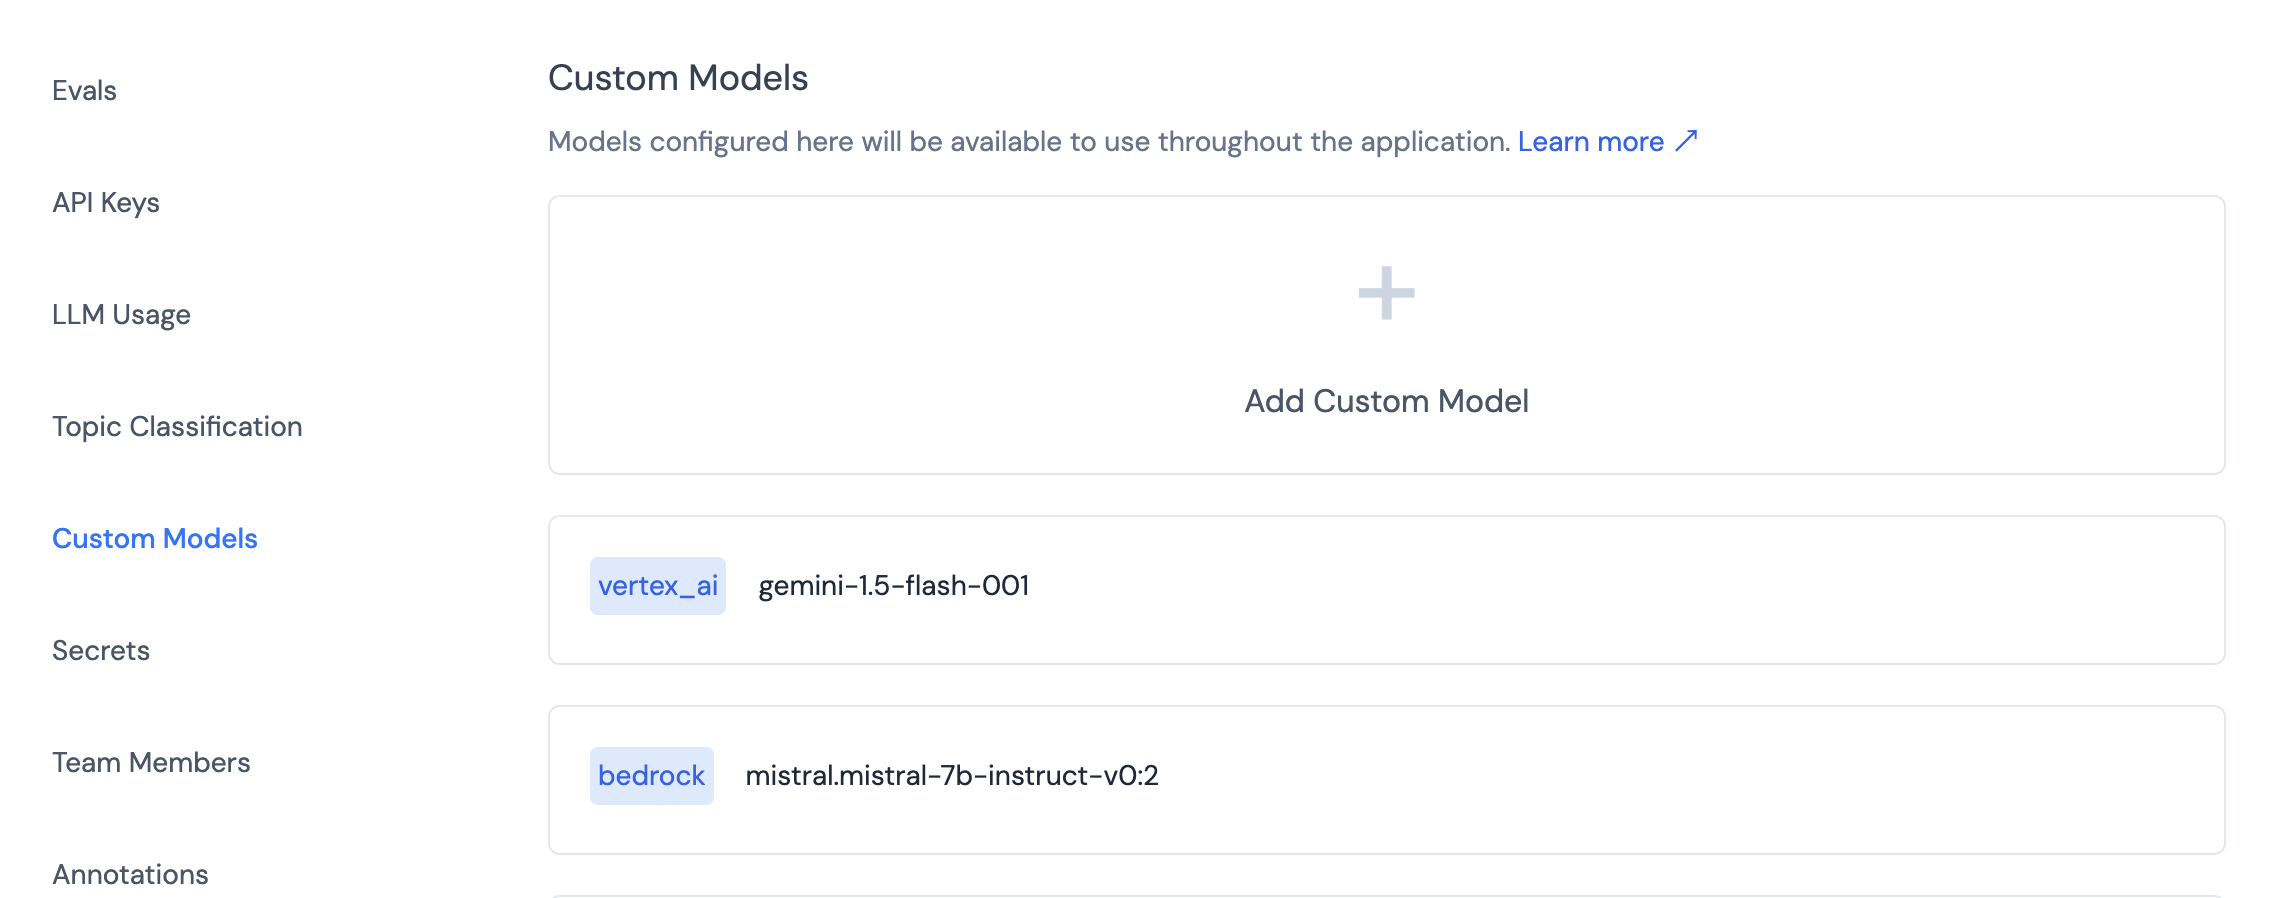
Navigate to the Custom Models section
- Go to https://app.athina.ai/settings?activeTab=custom_models
- Click on the “Custom Models” tab

-
Add a new custom model
- Click on the “Add Custom Model” button

- Click on the “Add Custom Model” button
-
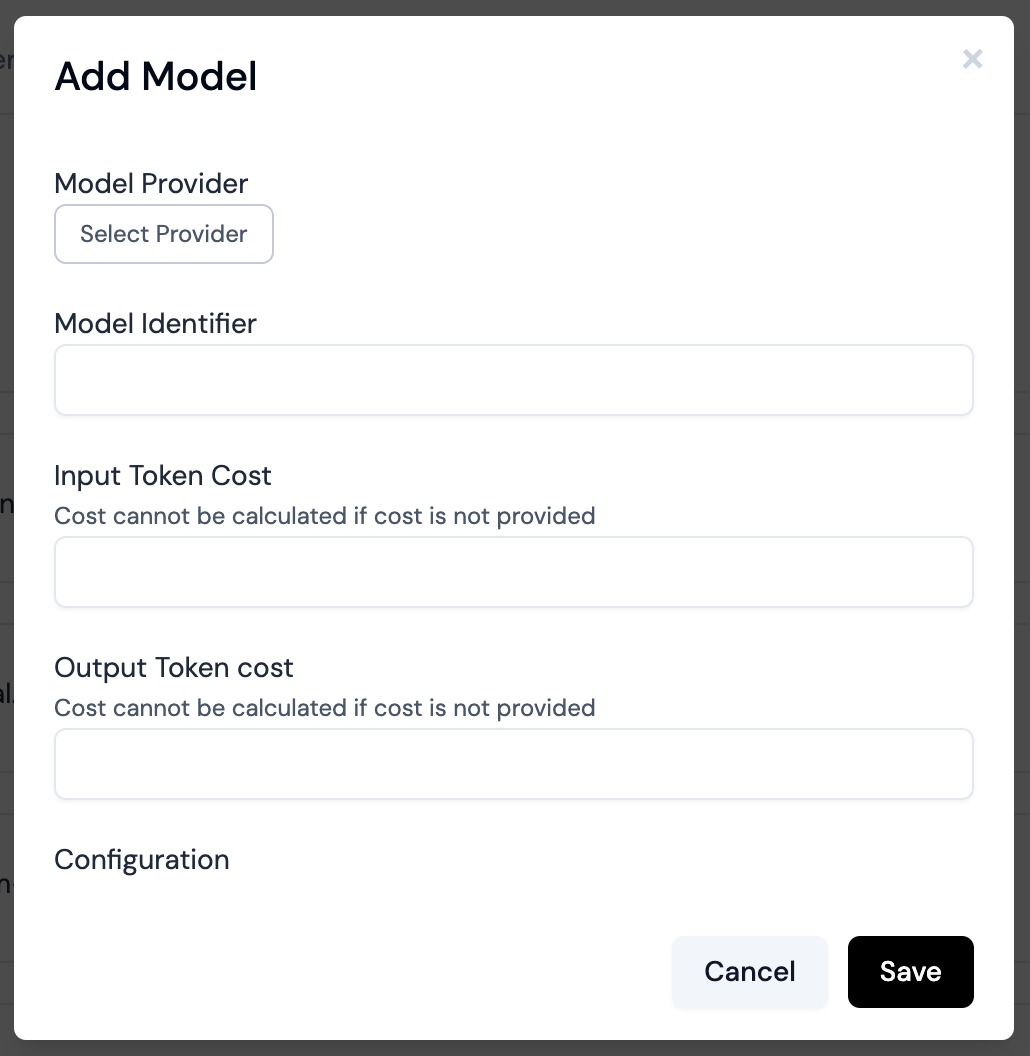
Select AWS Bedrock as the provider
- In the “Provider” dropdown, select “AWS Bedrock”

- In the “Provider” dropdown, select “AWS Bedrock”
-
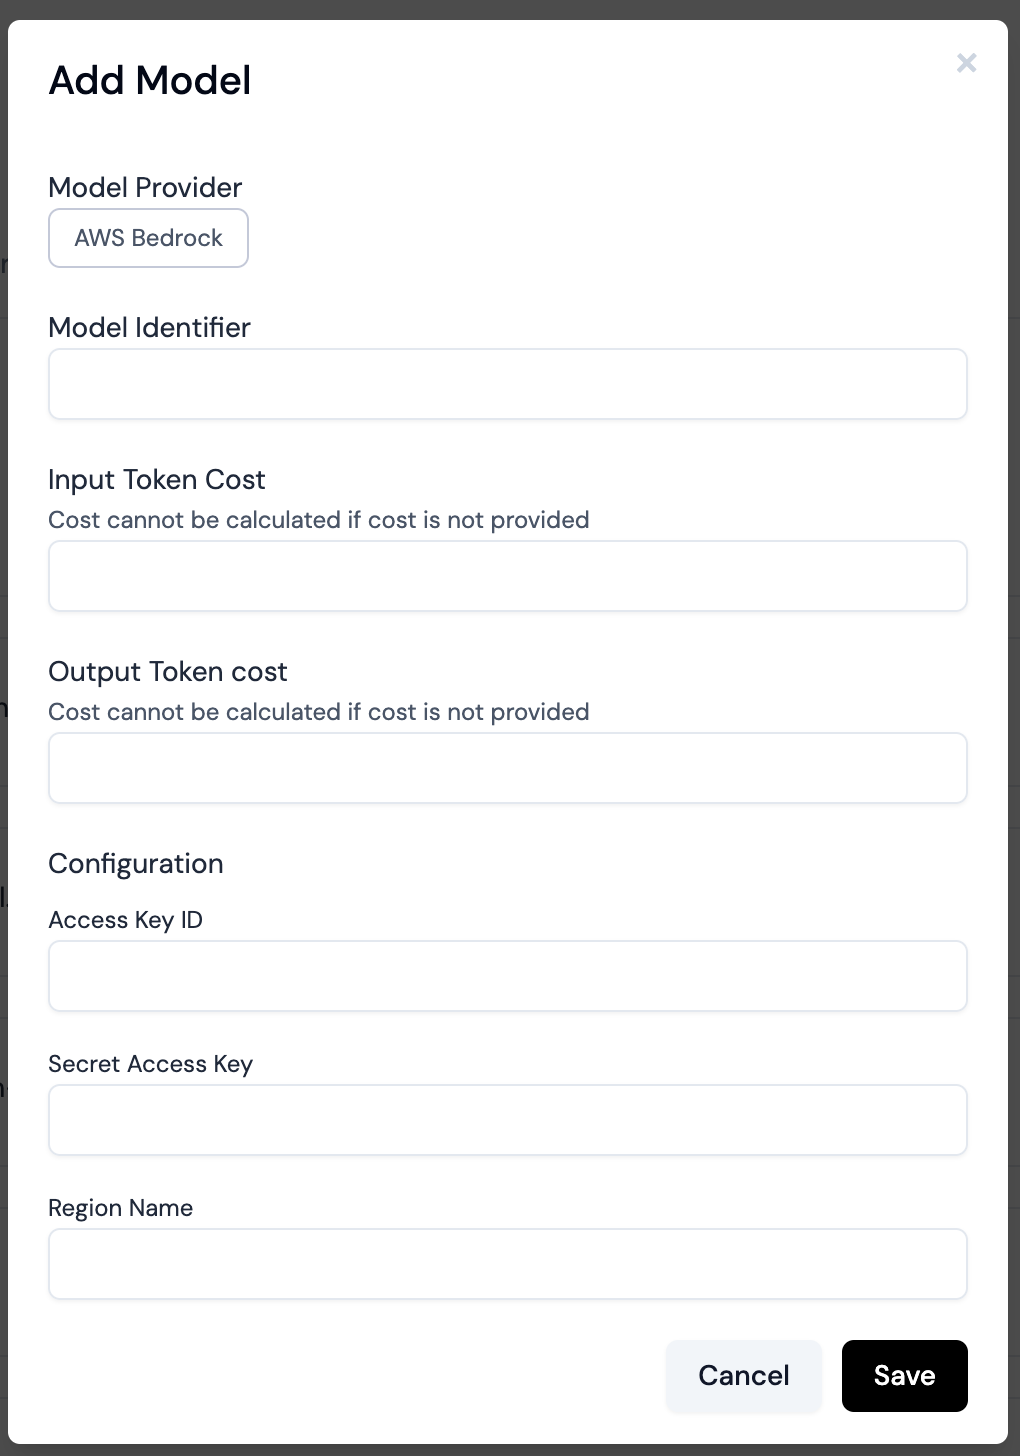
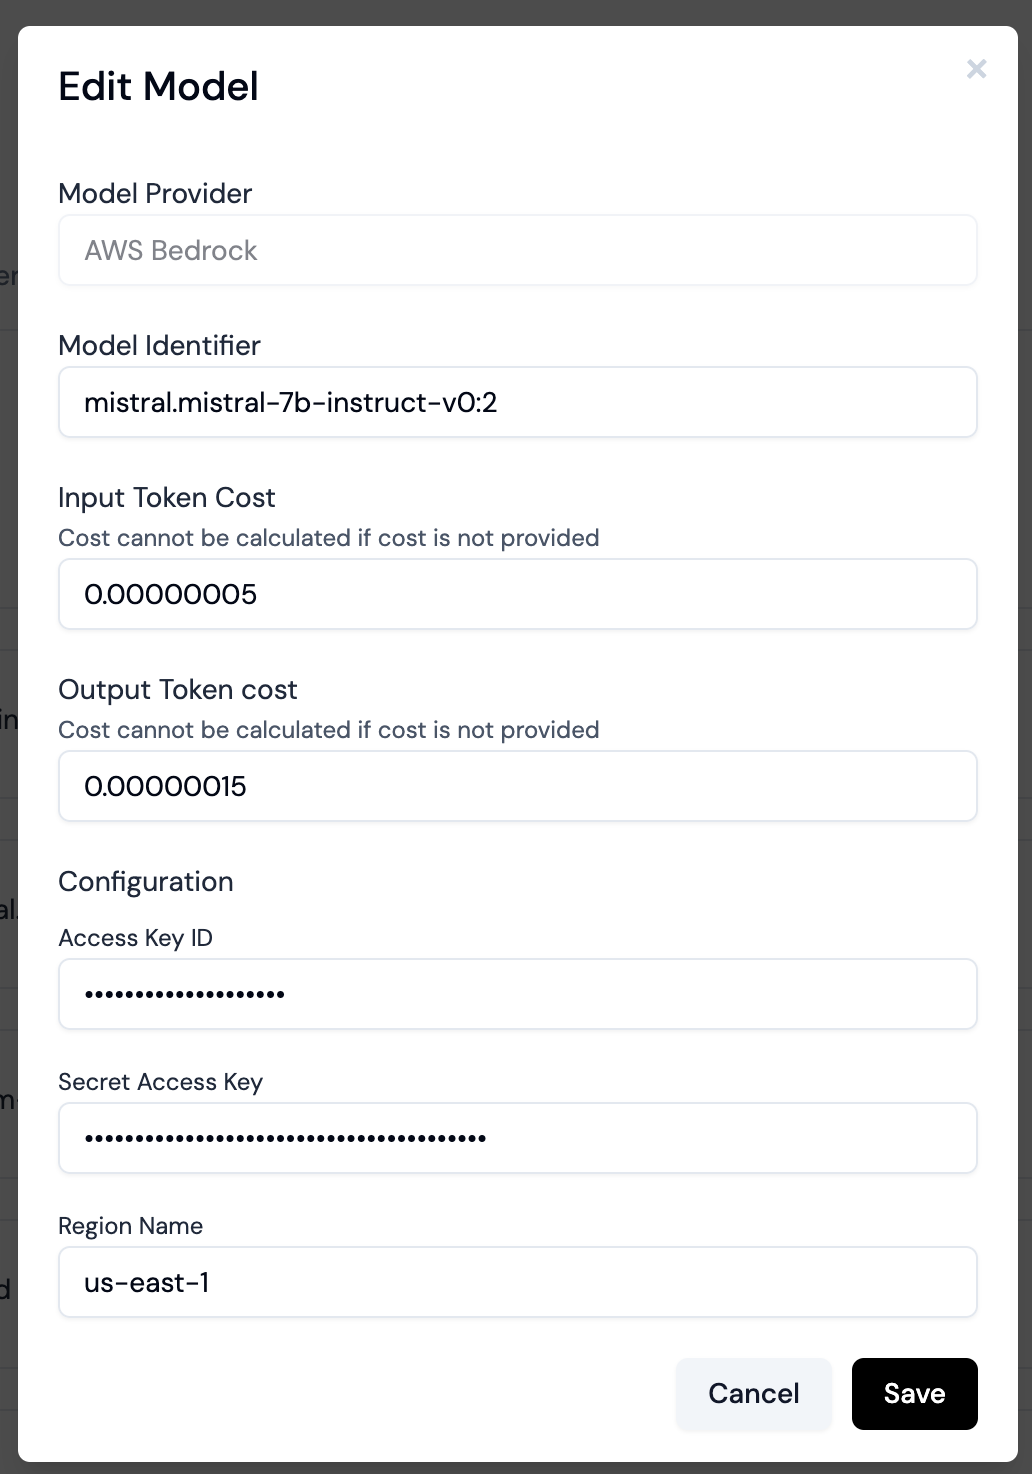
Configure AWS Bedrock settings
- Model ID: Enter the specific model ID you want to use (e.g., “anthropic.claude-v2”)
- Access Key ID: Enter your AWS Access Key ID
- Secret Access Key: Enter your AWS Secret Access Key
- Region: Enter the AWS region where your Bedrock model is hosted (e.g., “us-east-1”)

-
Save the custom model
- Click the “Save” button at the bottom of the form
-
Verify the model is added
- You should now see your new AWS Bedrock model listed in the Custom Models table

- You should now see your new AWS Bedrock model listed in the Custom Models table

